

If the graphics card and its WDDM 2.7 driver for your Windows 10 build 19041 and higher computer supports hardware acceleration, you can turn on hardware-accelerated GPU scheduling to reduce latency and improve video output performance. However, it doesn’t work right out-of-the-box, as it requires newer drivers from the graphics card manufacturers.
Nvidia supports Hardware-accelerated GPU scheduling starting with its driver version 451.48. If you have Intel integrated graphics, the feature is available since driver version 27.20.100.8190. In the case that you have an AMD card, then you’ll have to wait a little longer until the driver supports the new feature.
In this guide, you’ll learn the steps to enable hardware-accelerated scheduling for the graphics on Windows 10 version 2004.
How to enable hardware-accelerated GPU scheduling on Windows 10
To turn on hardware scheduling on Windows 10, use these steps:
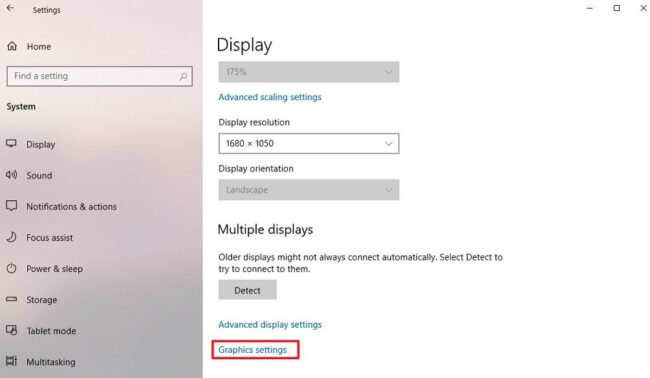
- Open Settings.
-
Click on Display.
- Under the “Multiple displays” section, click the Graphics settings option.
Display settings - Click the Change Default Graphics Settings option.
- Turn on the Hardware-accelerated GPU scheduling toggle switch to enable the feature on Windows 10.
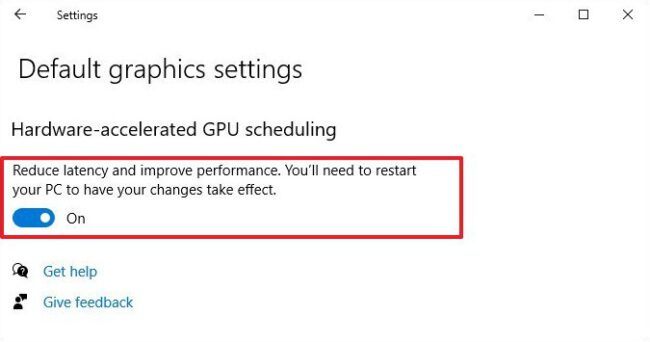
Windows 10 hardware scheduling (source: Nvidia) - Restart your computer.


Once you complete the steps, the new option should apply, and you should be able to see better latency and performance playing PC games.
COMMENTS